De-Mystifying the feared file type — GIF with Nikhil Shrestha
TURN YOUR MESMERISING GRADIENT-HEAVY ANIMATIONS INTO BEAUTIFUL GIFS
Ironically, please allow a few seconds for the GIFs to load on this page.
Remember,
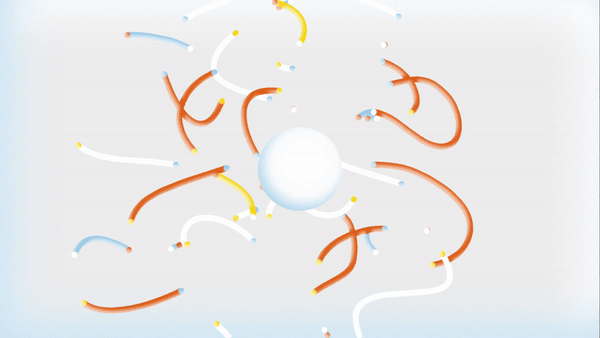
Flat colours — Friend, Gradients & Lighting Effects — Foe
A small deterioration in the quality is inevitable, but don’t let this stop you from harnessing the power of a GIF!
Small File size = Faster Loading Times = Better Experience
The catch?
Shittier quality.
In my experience, the two best methods to export GIFs with small file sizes and decent quality have been via Photoshop or EZGif. Of late, the Motion Tools Pro Plugin (Free) has come out with a GIF exporter and I use that sometimes to export a quick GIF.
That being said, when I want more control, Photoshop or EZGif are my go-to methods.
1. Photoshop Pipeline
After Effects Animation > Export Image Sequence > Import Photoshop IMG Sequence > Export GIF > Optimize on EZGIF > Download
or
After Effects Animation > Export MP4 > Import MP4 in Photoshop > Export GIF > Optimize on EZGIF > Download
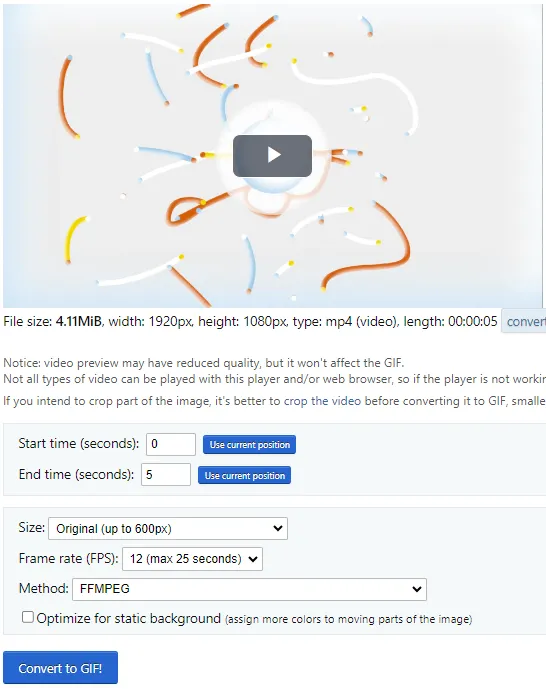
2. EZGif
Import MP4/ MOV into EZGif > Convert to GIF > Optimize with EZGIF > Save GIF
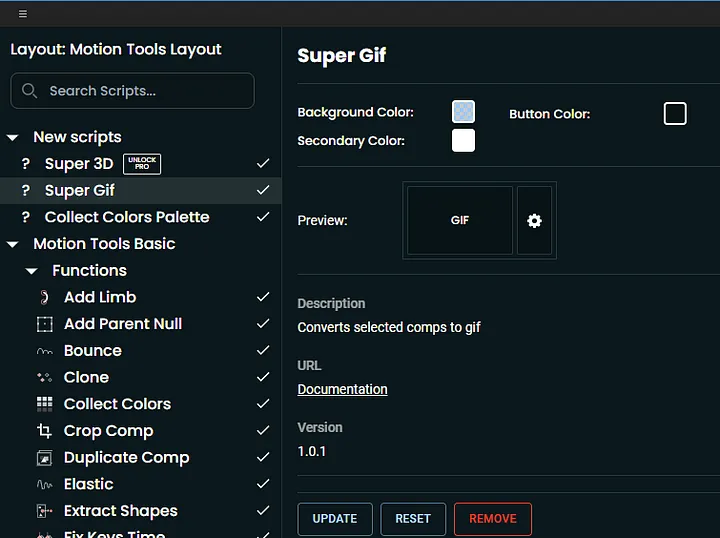
3. Motion Tools Plugin for After Effects
AE Animation>Motion Tool Pro (Free Plugin)> Add the Super GIF Script>Click the Cog Wheel>Export the GIF
Things to remember when exporting from
1. Photoshop:
GIF Length: Try not to exceed 8–12 seconds
Dimensions: Keep the export closest to the actual dimensions on screen
Frame Rate: 10 or 12 fps
Export Settings,
Alpha: Turn on “Transparency” if the GIF needs to be against any background.
Matte: Keep this on “None” if your GIF will be placed against a coloured/ complex background with many colours
Else click “Other” and add the background’s hexcode to prevent a halo around the artwork.
Else click “Other” and add the background’s hexcode to prevent a halo around the artwork.
Looping Options: Choose the looping option as “Forever”, “Once” or “Other”.
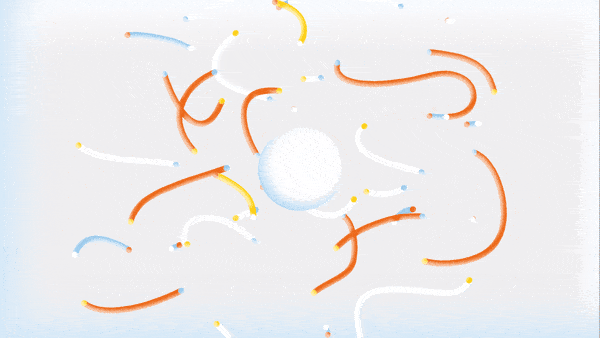
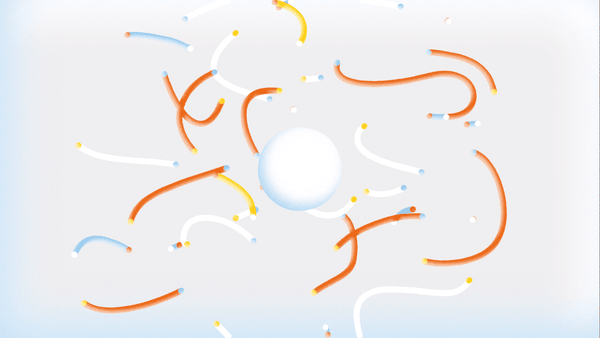
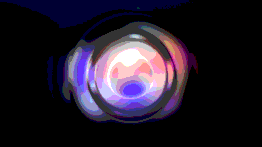
Animation by Nikhil Shrestha

Photoshop (MP4 to GIF) 2.41MB
2. EZGIF:
GIF Length: Try not to exceed 8–12 seconds; Lower Lengths will give lower file sizes
Dimensions: Keep the export closest to the actual dimensions on screen
Frame Rate: 10 or 12
For Optimization to further reduce the file size,
Lossy GIF with a compression level of about 80–100 should work fine.
Lossy GIF with a compression level of about 80–100 should work fine.
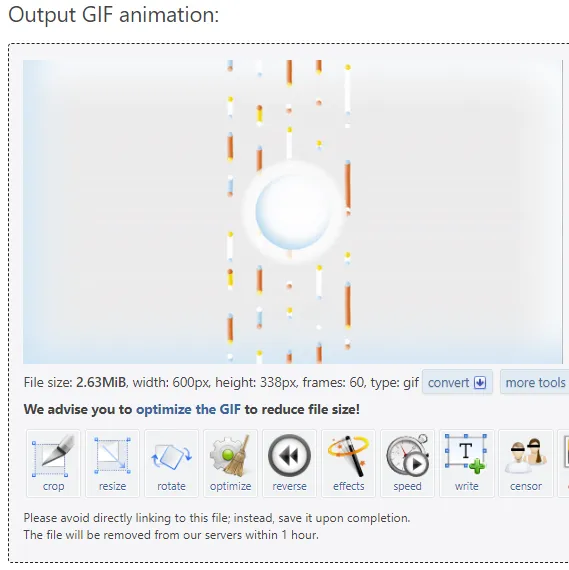
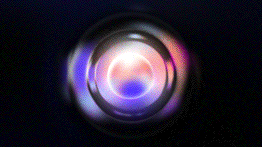
EZGIF 2.33MB
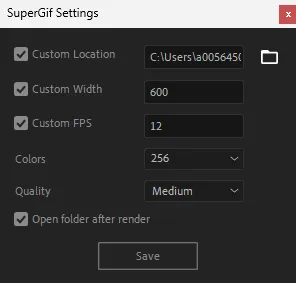
3. Motion Tools Pro Plugin (Free)
This one is by far the simplest and fastest, set custom width, FPS and quality — then select your destination folder and export!/
I’d say this method is the fastest, no-nonsense way to export a GIF and it even outputs an Optimised GIF along with a full-size GIF by default, but it’s not always the best option since you can’t control the output too much.
I’d say this method is the fastest, no-nonsense way to export a GIF and it even outputs an Optimised GIF along with a full-size GIF by default, but it’s not always the best option since you can’t control the output too much.
PS — if you don’t see the option to export gifs,
Click the plus button on a space in the MTP plugin (you’ll see a button appear on hover) followed by a layout menu. Check the ‘Super Gif’ option to add the button to the main layout.
Motion Tools Pro — Optimised GIF 951KB
Motion Tools Pro — Not Optimised 4.23MB
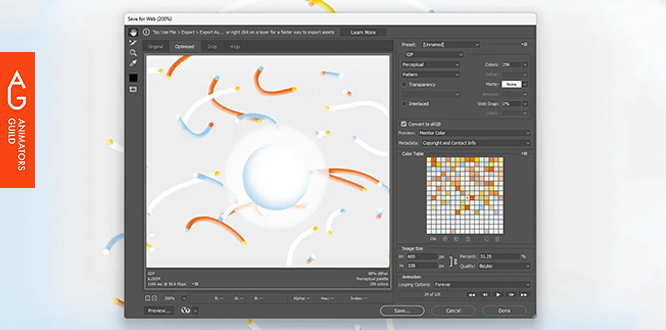
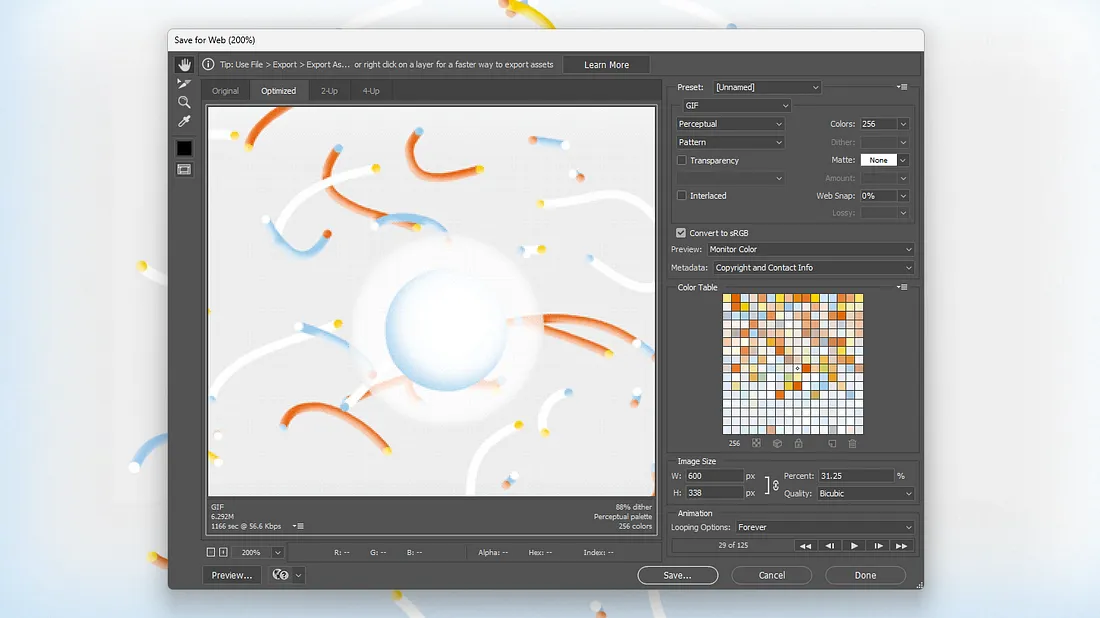
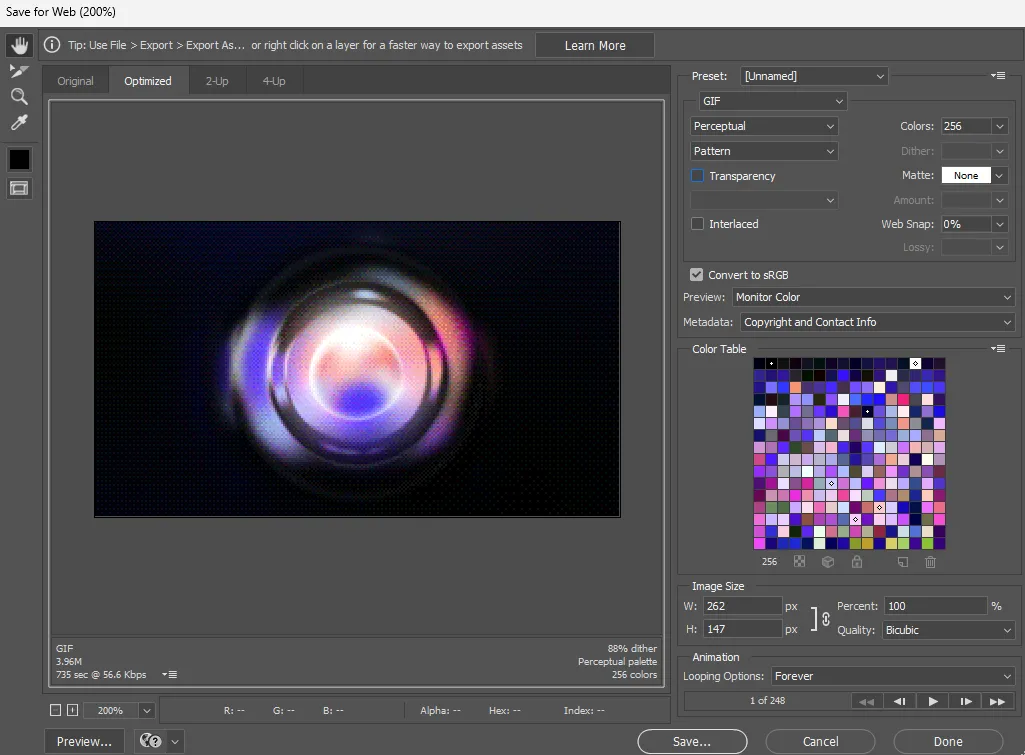
Exploring the ‘Save for Web’ Option in Photoshop
Experiment, Process, Outcome
What do all the different options in the Photoshop ‘Export for Web’ menu do for exporting GIFs? It’s daunting, I know.
Animation by Graison Varghese
Here is how I went about the experiment —
The source clip was 8 seconds long and 23.6MB
These export settings were kept constant -
Transparency — Off
Transparency — Off
Colors — 256
Matte — None
Image Size — 262 x 147
Matte — None
Image Size — 262 x 147
I cycled through the different color-reduction algorithms combined with dithering options to compare the results.
I tried a combination of each colour optimization with each dithering option and got a total of 16 outputs.
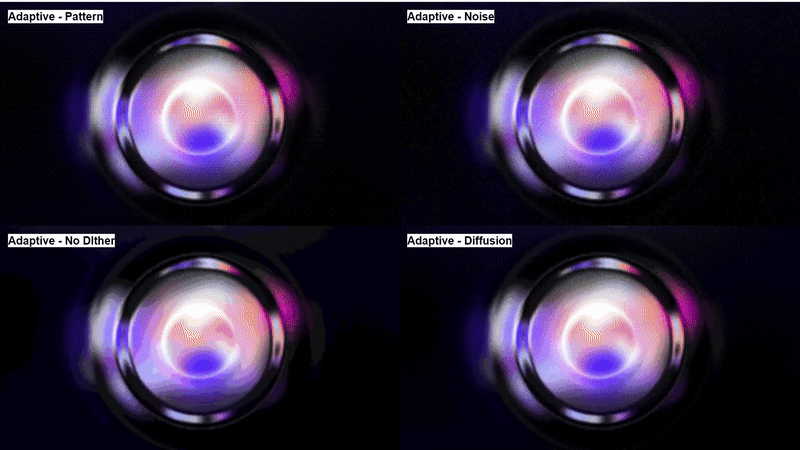
Adaptive
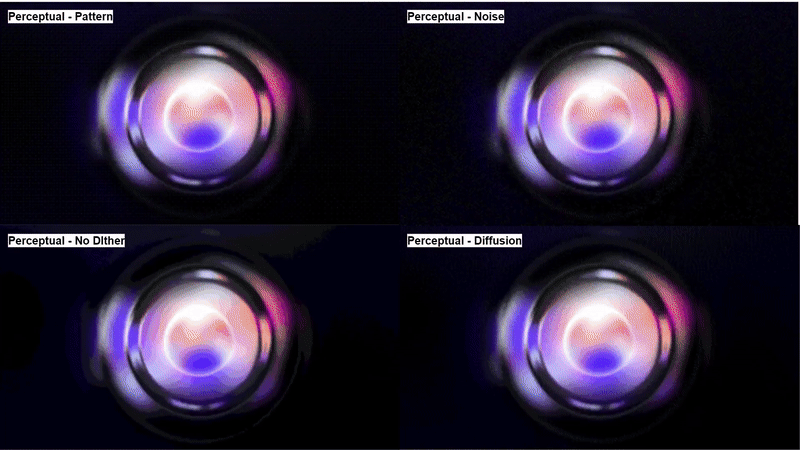
Perceptual
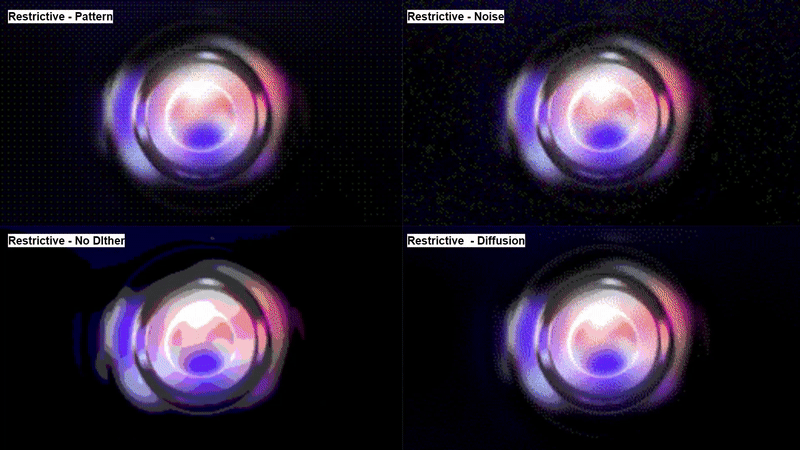
Restrictive
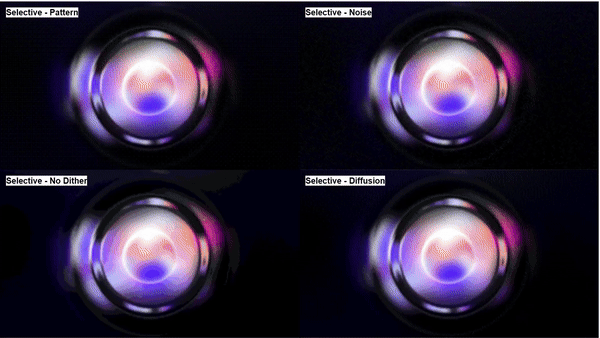
Selective
Here are my findings:
I visually checked these to figure out which option looked the best — for me that option was Perceptual Pattern.
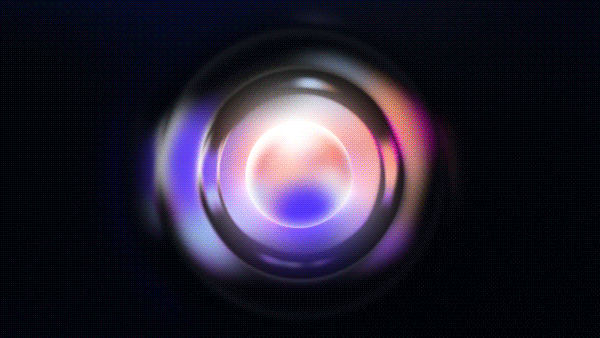
Perceptual — Pattern 600 x 388px
IMO this was the best result that I got from Photoshop — here it is below compared to the result I got with EZGIF

EZGIF

Perceptual Pattern 262 x 147px
Here are the file sizes for a 262 x 147px image,
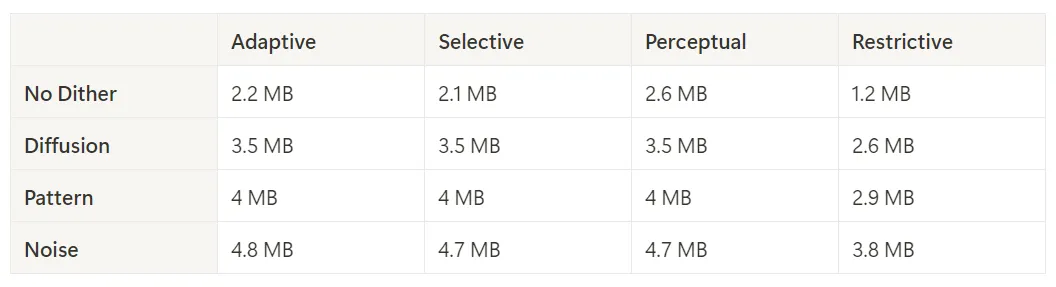
Restrictive with No Dither had the smallest file size at 1.2MB
Adaptive with Noise was the heaviest file 4.8MB
Restrictive with No Dither
Adaptive with Noise
The file sizes between Adaptive, Selective and Perceptual were almost the same. Visually, I didn’t catch any evident differences between them.
The process of rendering a GIF can get tricky and troublesome fairly quickly, I hope this article gives you a little insight on how to go about working with this file type to reduce your trial-and-error approach.
Thanks for reading this far, cheers!
Additional Resources