UE4 STARTER GUIDE
Anyone interested in the gaming world, will have heard the name ‘Unreal Engine’ at least once. For the ones new here, Unreal Engine is a free game engine released by Epic Games and first showcased in the 1998 first-person shooter game Unreal. Currently it is in its latest iteration, Unreal Engine 4 (Unreal Engine 4.26 to be exact).
While most people interpret it to be a game engine (a software that facilitates the creation of video games), its advanced rendering capabilities have also been leveraged in the creation of films, architectural realizations and even as a VFX tool for some high-profile Hollywood films and shows.
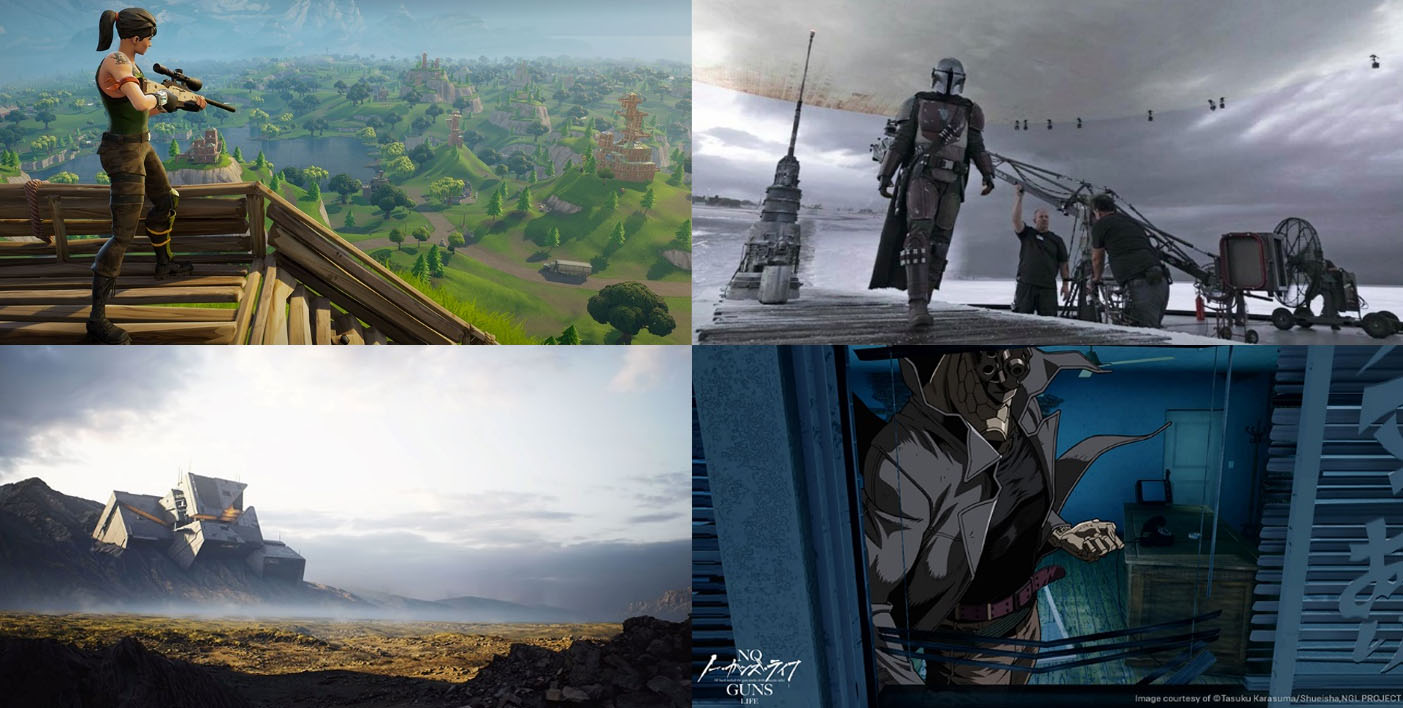
Popular games such as PUBG, Fortnite, Day Gone, Hellblade: Senua's Sacrifice, Final Fantasy 7 remake have been released using Unreal Engine 4. Series such as The Mandalorian used Unreal Engine 4 exclusively for its CGI Backgrounds. It even touched the anime sphere with it being used for the backgrounds in Madhouse Studio’s No Guns Life. Short Films like Rebirth by Quixel have become quite popular as well.
While a full in-depth walkthrough of the software is beyond the scope of this article, we can give you some basic overview and some rundowns to get you started.
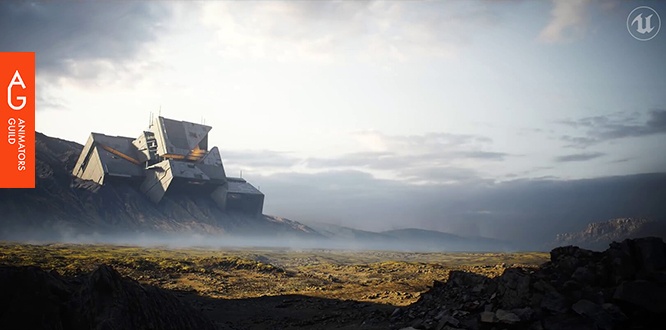
Rebirth is a pretty popular short film released by Quixel in 2019
This film was made completely in UE4 using assets from Quixel (a website that provides high quality photo-scanned models and textures) as a show case for their services. A breakdown of the same was also posted.
Rebirth Short film by Quixel
Rebirth breakdown
Unreal Engine 4 was also used extensively in the popular show ‘The Mandalorian’
UE4 was used to render out the backgrounds for the show. Instead of a green screen, a big LED screen was used which displayed the CGI backgrounds. Only the props that the characters interacted with were real. A virtual camera was placed in the scene which had live motion tracking set up with an actual camera in the set. So, the background would change according to what the real-life camera was seeing.
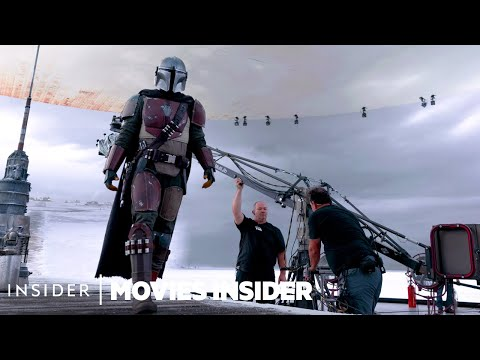
Ue4 use in the Mandalorian
UE4 System Requirements
OS: Windows 7/8/10 64-bit or Mac OSX Sierra.
CPU: Quad-core Intel or AMD processor, 2.5 GHz or faster.
GPU: NVIDIA GeForce 470 GTX or AMD Radeon 6870 HD series card or higher.
RAM: 8 GB
CPU: Quad-core Intel or AMD processor, 2.5 GHz or faster.
GPU: NVIDIA GeForce 470 GTX or AMD Radeon 6870 HD series card or higher.
RAM: 8 GB
HOW TO GET UNREAL ENGINE 4
Before stating any steps to get started, let us tell you how to get Unreal Engine 4 on your system. UE4 is available from the Epic Games Store.
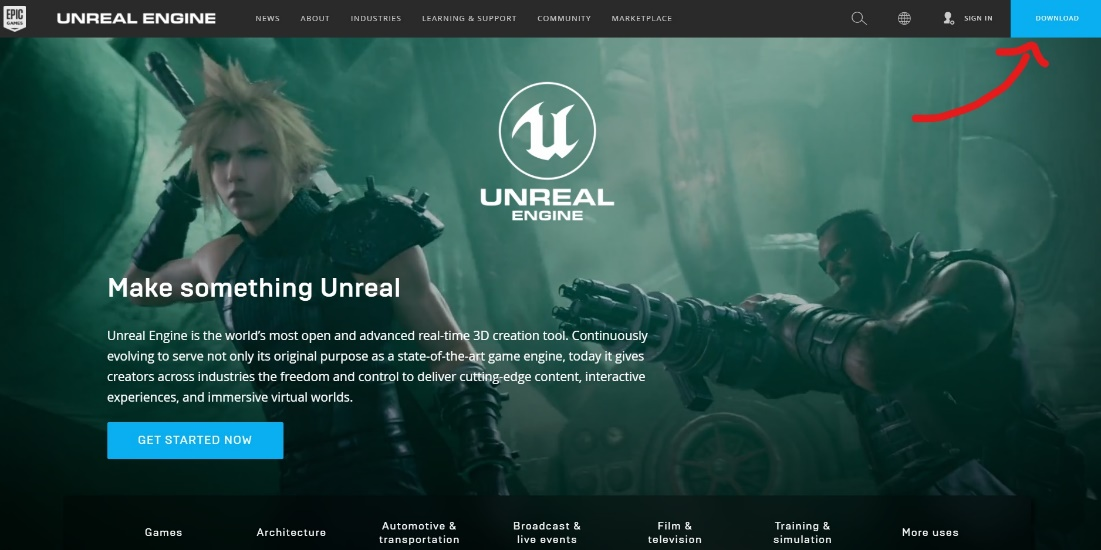
1. Head over to the Unreal Engine Website and click GET UNREAL in the top right corner.
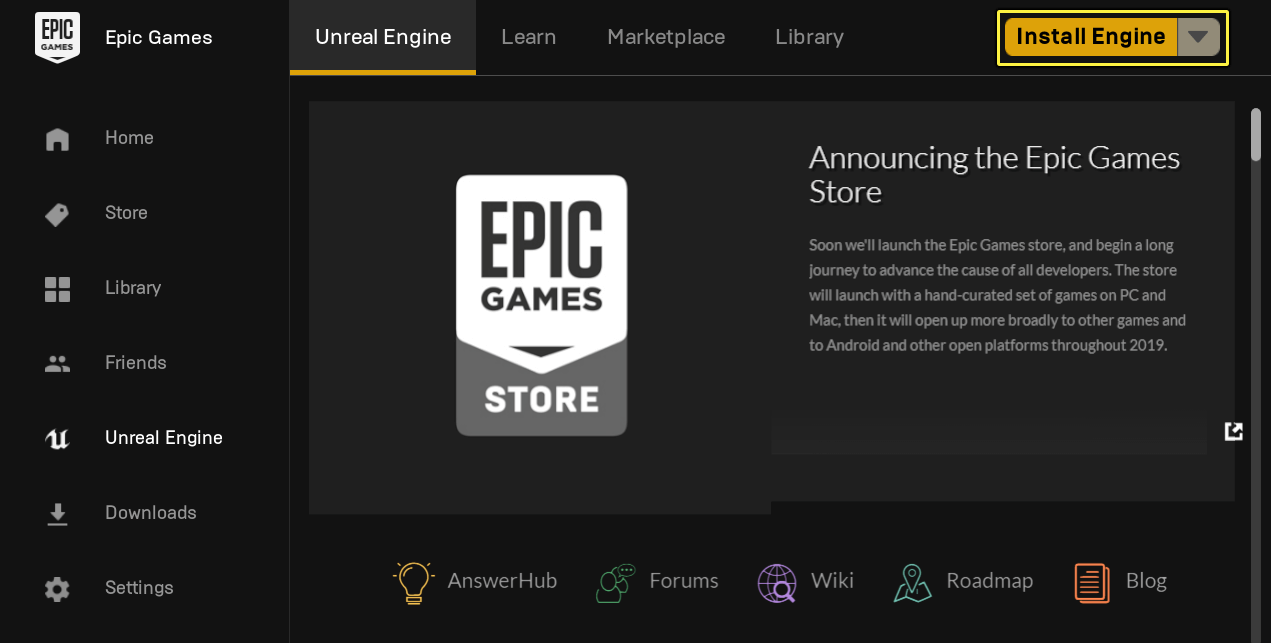
2. Open the installer once it is downloaded and install the Epic Games Launcher. You will have to make an Epic Games account. If you already have an account, you can sign in into Epic Games. On the Unreal Engine tab, click the Install Engine button to download and install the latest version of Unreal Engine.
Pro tip - If you make an account on Epic Games, you can use it get free access to the Quixel Library of high-quality photo-scanned models and textures.
GETTING STARTED
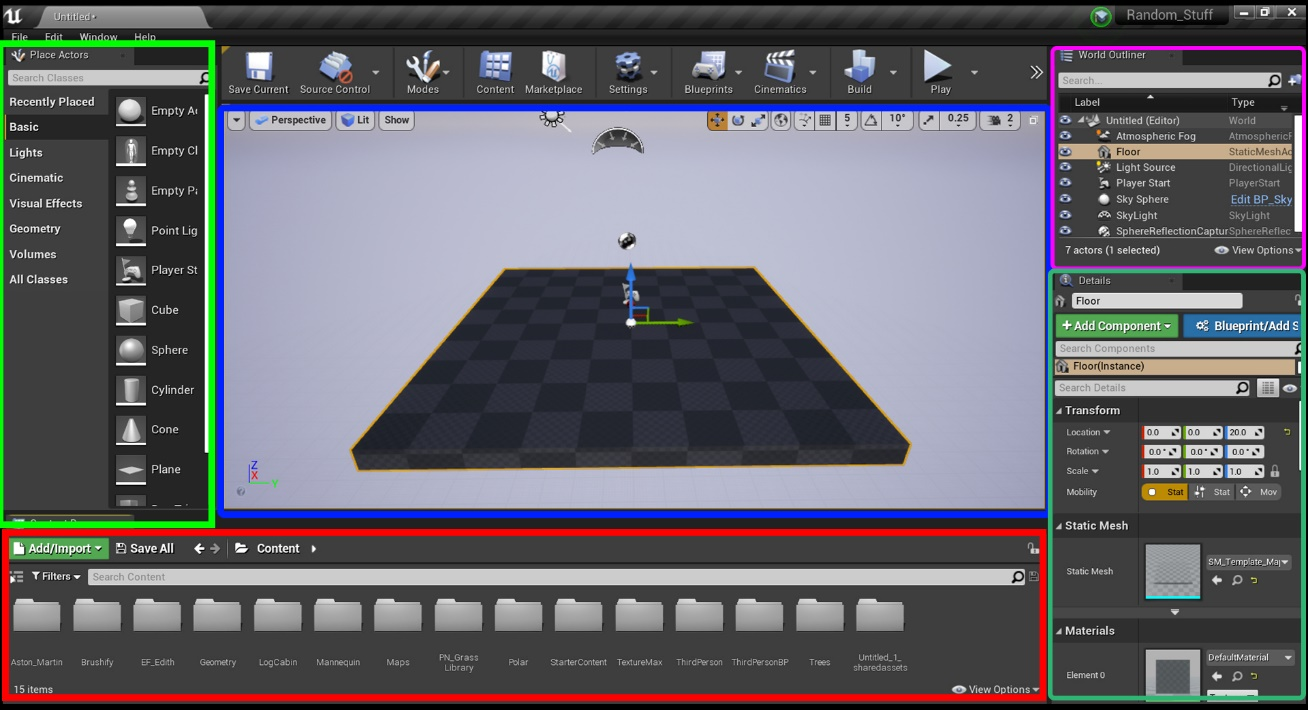
1. After finishing the download of the engine, click ‘launch’ to start Unreal Engine 4. After some initial loading, you will be greeted with a window like the one below. Here you can either select any existing UE4 projects you might have of choose to start a new one.
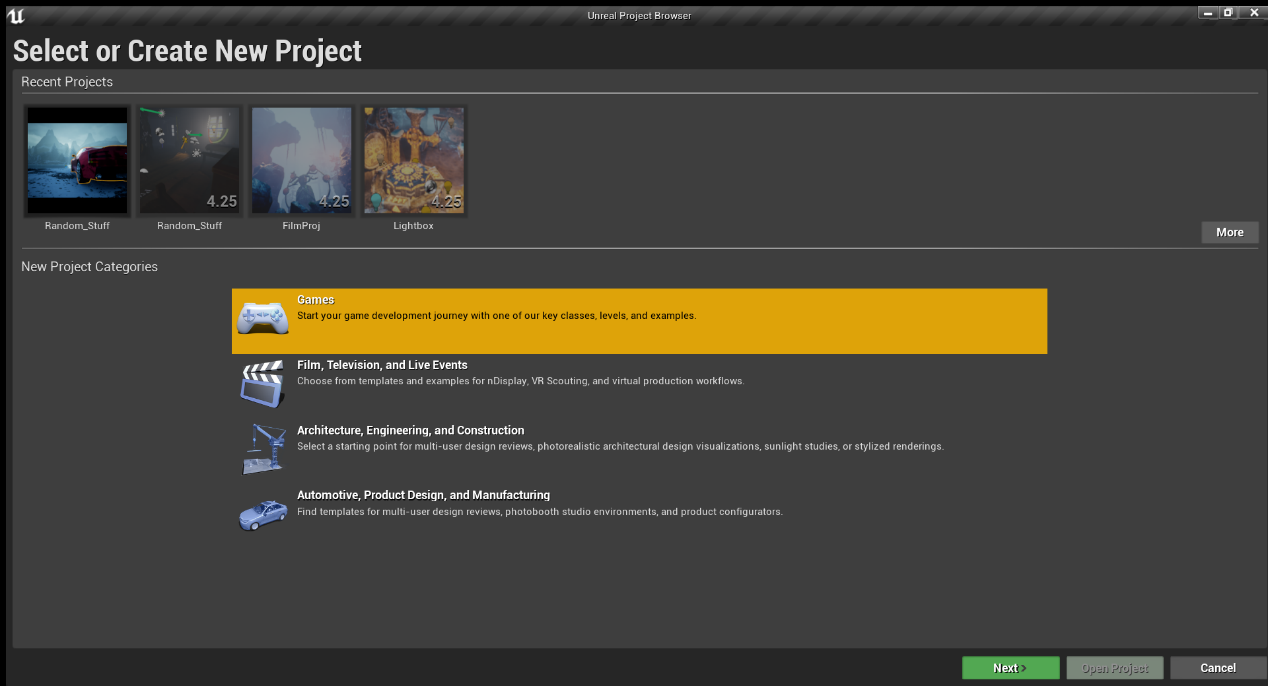
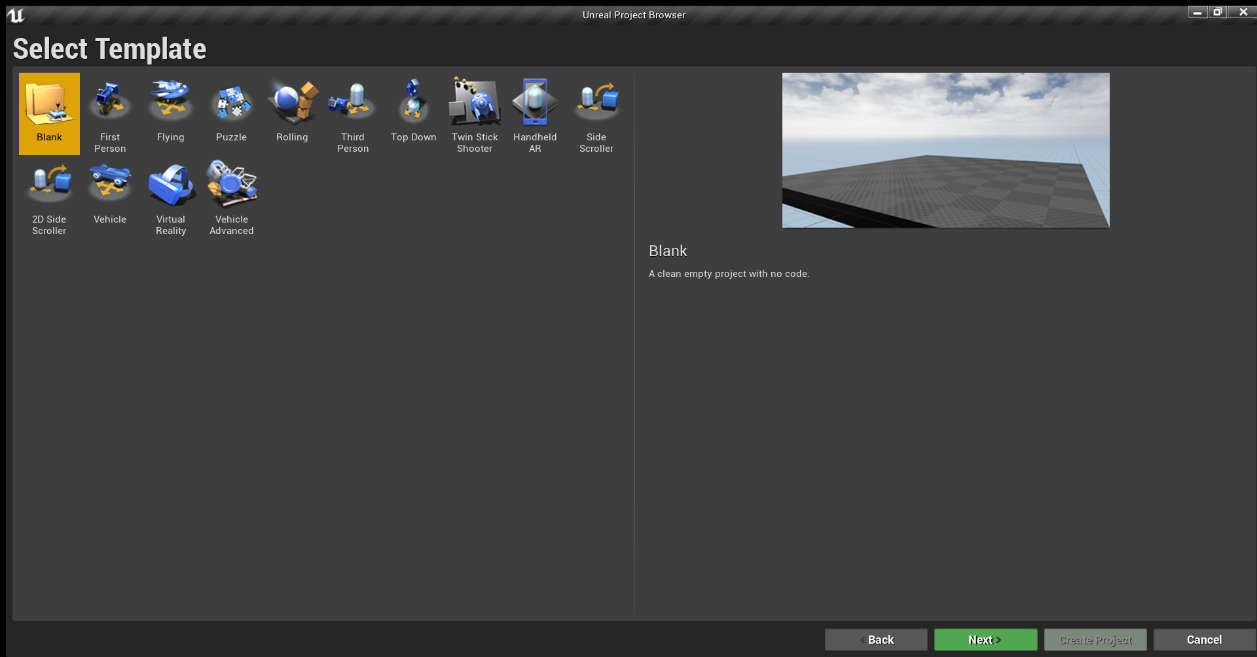
2. On selecting the game category, you will be taken to the window below. Depending on your preference of project, you can select your template.
The templates only provide a base to start the project. Any of the other templates can be recreated using your chosen template. This also applies for the above game categories.
3. Following your selection, you will be led to the below window where you can customize your project.
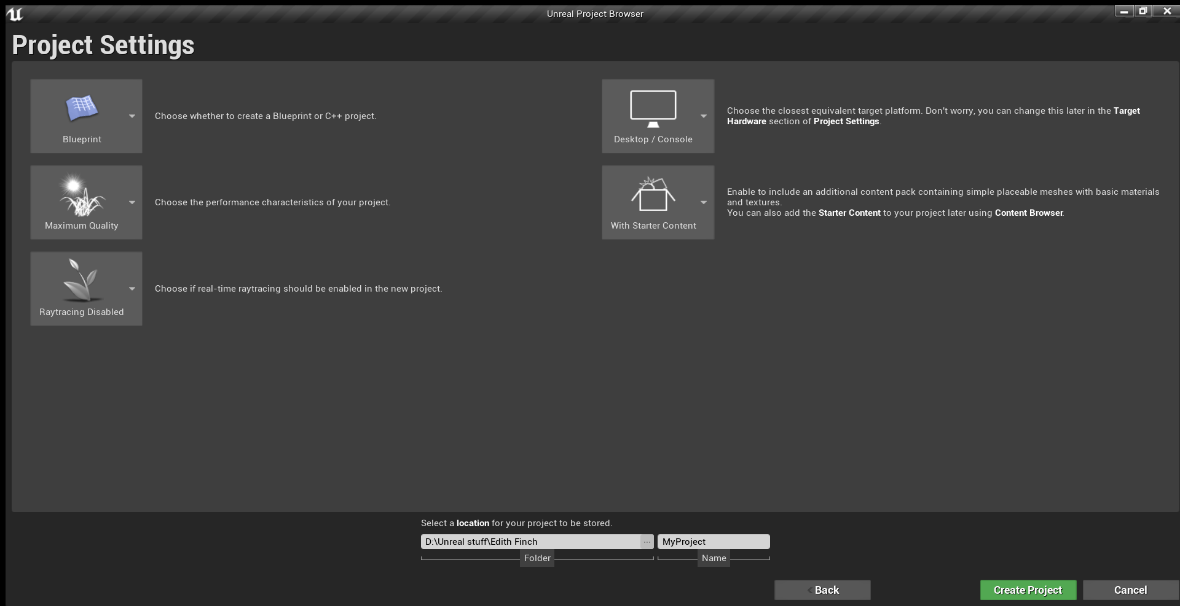
The options are as follows-
BLUEPRINTS- This is where you select whether you want to use either C++ or UE4’s Visual Scripting system to write any scripts that may need to be written.
TARGET HARDWARE- Selecting Mobile/Tablet will disable some post processing effects. It will also enable using the mouse as a touch input. Setting this to Desktop/Console will allow you to use the full package.
This applies only for game projects. For any other type of project (film etc.) set this to Desktop/Console.
GRAPHICAL TARGET- Selecting Scalable 3D or 2D will disable some post processing effects. Set this to Maximum Quality to use all the features available.
STARTER CONTENT- Use this to include some models, material, textures etc. that come packaged with UE4.
RAYTRACING- This enables the Real Time Raytracing, a new feature that will allow you to use Raytraced Reflections, Raytraced Shadows and Raytraced Global Illumination (Indirect Lighting).
This feature requires Nvidia’s RTX line of graphic cards or any other equivalent. Raytracing will not work with any other set of graphics cards.
VIEWPORT
The Viewports are your window into the worlds you create in Unreal. They can be navigated just as you would in a game, or can be used in a more schematic design sense as you would for an architectural blueprint. The interface might seem a little complex on first viewing, but on learning the ins and out of it, it becomes a powerful tool to speed up and enhance the workflow.
1. Basic Explanation
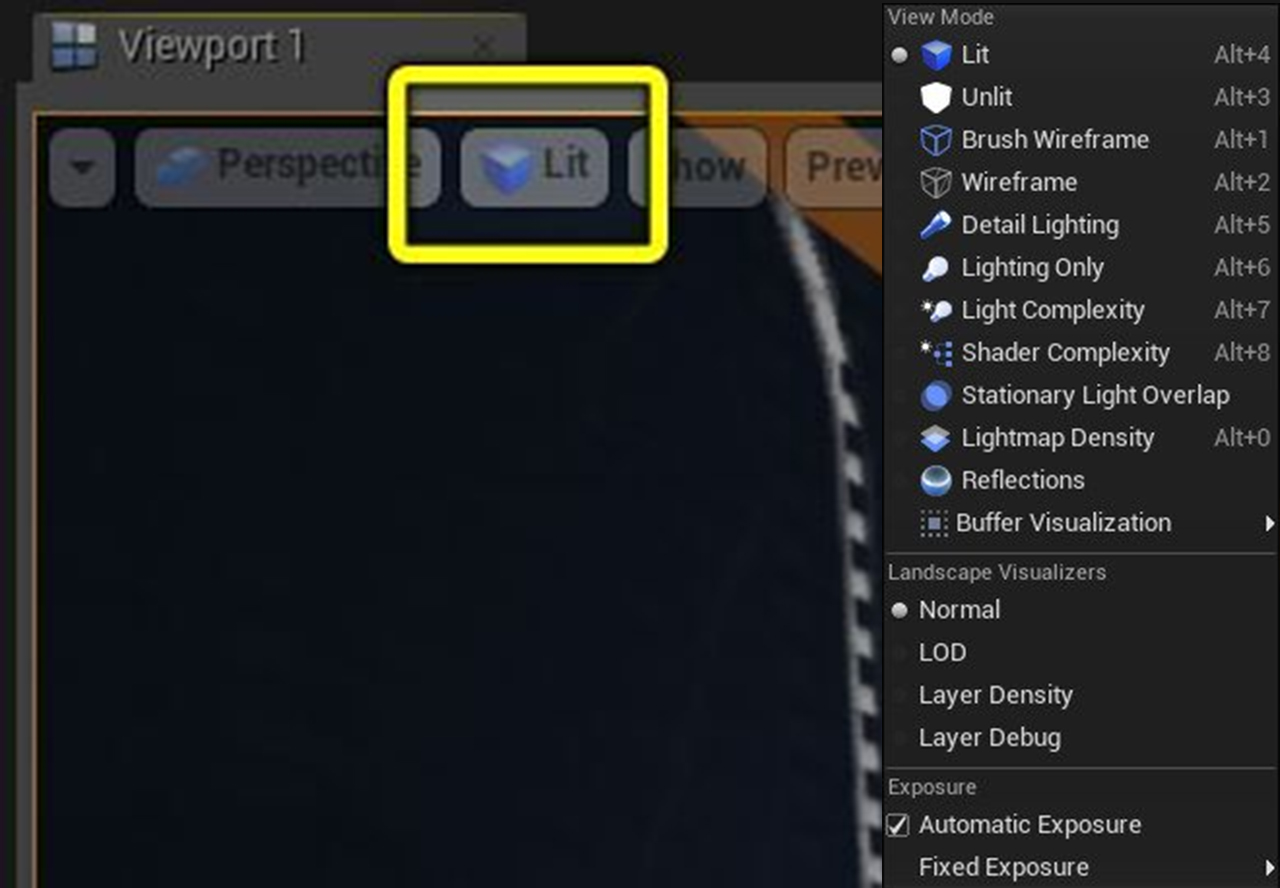
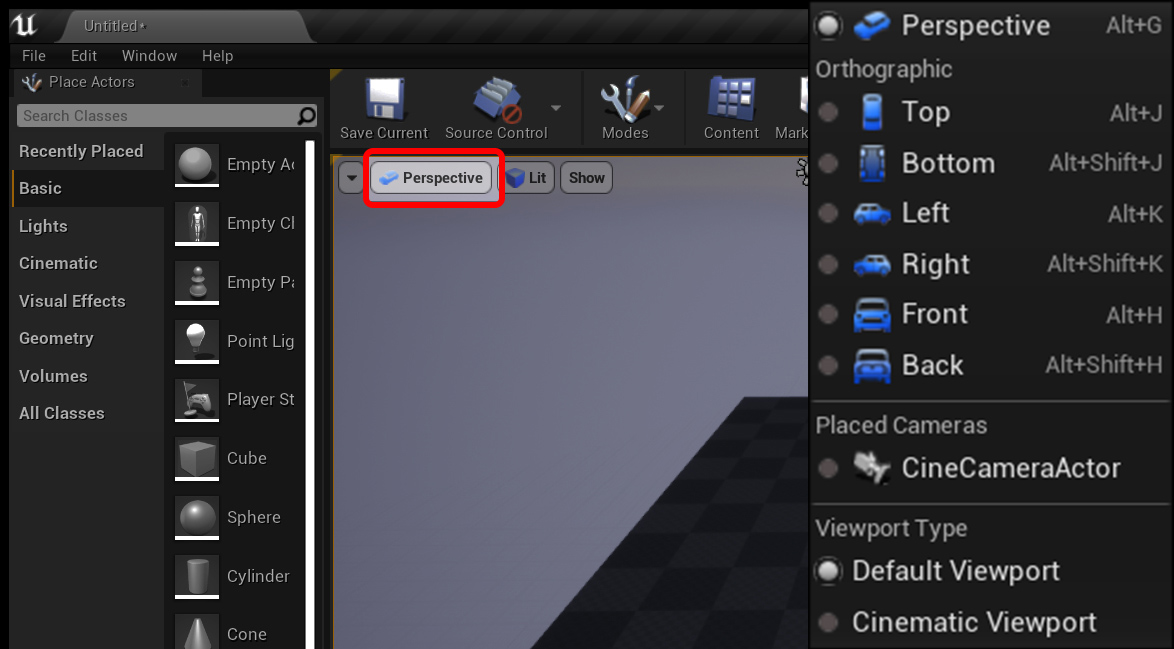
2. View Modes
The Unreal Editor viewports have a large number of visualization modes to help you see the viewport using different modes such as ‘LIT’, ‘UNLIT’, ‘WIREFRAME’ etc. as well as to diagnose any errors or unexpected results. The more common view modes have their own hotkeys, but all can be accessed from the viewport within the View Mode menu.
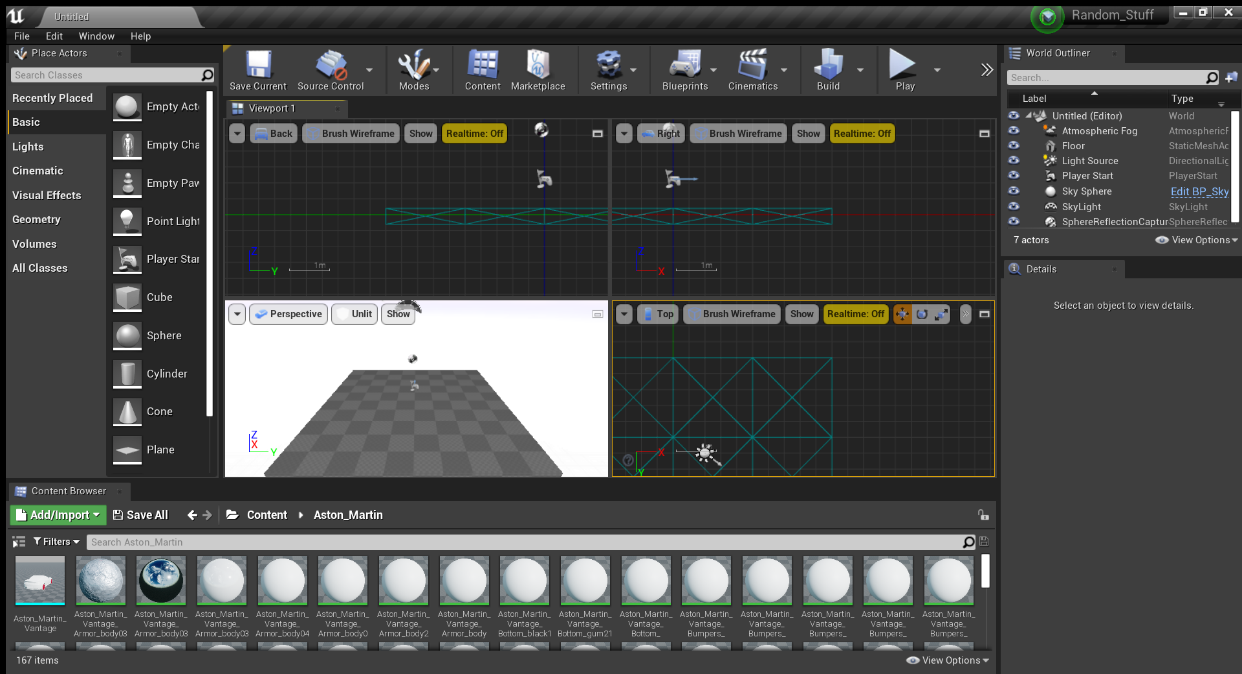
3. 3.Viewport Layout
The Viewport can be broken also divided in to separate panels.
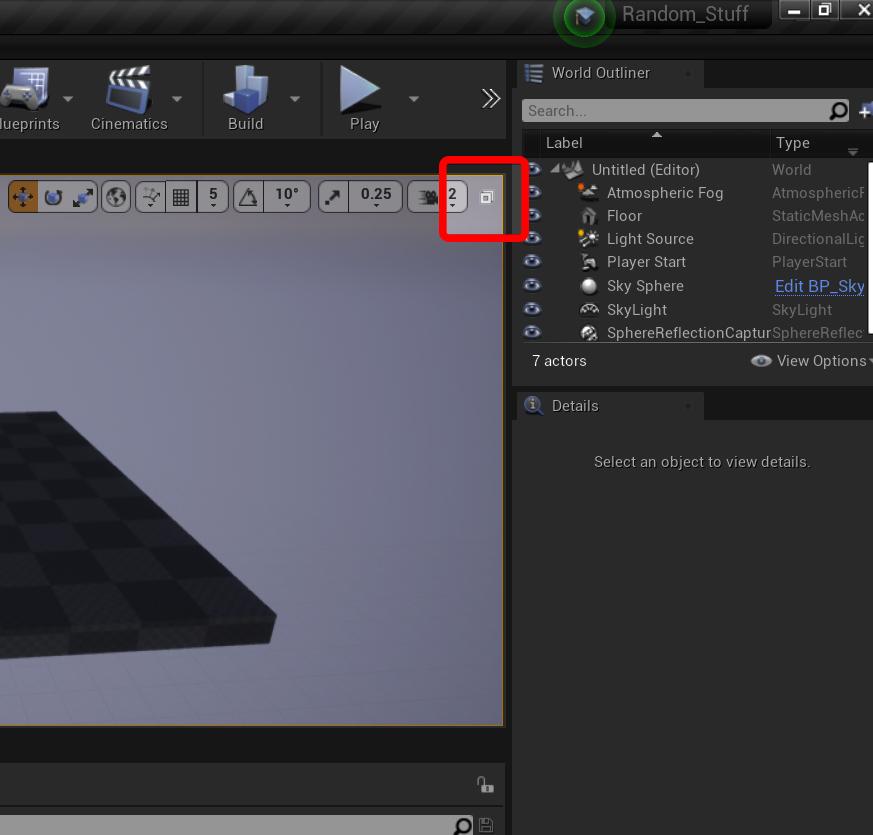
The orientation can be changed for a viewport by using the button as shown below. The menu can also be used to switch to camera that exists in the scene.
VIEWPORT NAVIGATION
STANDARD CONTROLS - These controls represent the default behavior when clicking and dragging in the viewports with no other keys or buttons pressed. These are also the only controls that can be used to navigate the orthographic viewports.
LEFT MOUSE BUTTON + DRAG : Moves the camera forward and backward and rotates left and right.
RIGHT MOUSE BUTTON + DRAG : Rotates viewport camera
LEFT MOUSE BUTTON + RIGHT MOUSE BUTTON + DRAG : Moves camera up and down.
F : Focus on selected object
GAME STYLE CONTROLS - The WASD controls will feel natural to those who are used to playing games on the PC. They are enabled by default and can be used whenever you are holding RIGHT MOUSE BUTTON. This means you will still use RIGHT MOUSE BUTTON to turn the camera while navigating in this way.
These controls are mirrored on the arrow keys and num pad to provide alternate access to them.
W / Numpad8 / Up : Moves the camera forward.
S / Numpad2 / Down : Moves the camera backward.
A / Numpad4 / Left : Moves the camera left.
D / Numpad6 / Right : Moves the camera right.
E / Numpad9 / Page Up : Moves the camera up.
Q / Numpad7 / Page Down : Moves the camera down.
Z / Numpad1 : Zooms the camera out (raises FOV).
C / Numpad3 : Zooms the camera in (lowers FOV).
When navigating with WASD while holding down the RIGHT MOUSE BUTTON, you can rotate the mouse wheel up to speed up your movement, or rotate the mouse wheel down to slow down your movement.
TRANSFORM CONTROLS
LMB + Drag (on Transform Tool) : Moves, rotates, or scales the currently selected Actors, depending on the active transform gizmo.
W : Selects the Move Tool.
E : Selects the Rotate Tool.
R : Selects the Scale Tool.
W : Selects the Move Tool.
E : Selects the Rotate Tool.
R : Selects the Scale Tool.
WHAT’S NEXT
What you've learned here is just you're beginning with Unreal Engine. You’re now in a great position to start learning the basics of Unreal Engine 4.
Here are some YouTube Channels or websites to get you started on your first project.
PERSONAL THOUGHTS
Unreal Engine 4 is a tool that is slowly getting used in many fields worldwide and being recognized as a powerhouse in Realtime 3d rendering. From Games, to films to Architectural renders to VR, AR and beyond. For anyone interested, I think that this an exciting time to get started with a game changing software.
And with Unreal Engine 5 just on the horizon, the possibilities are endless.